

I had a request from a fellow blogger to do a step by step post of painting a transparent glass with water and reflections so I thought I would try it out. I just did it the way that I paint, which is by no means perfect and maybe not the best way for a how-to guide, but perhaps someone can take something away from it or at the very least, find it interesting. So anyway, this is just a shot glass — it looks like a highball glass but it’s tiny; I chose it because it was a very simple glass with no patterning, and even then it’s never as simple as you think.
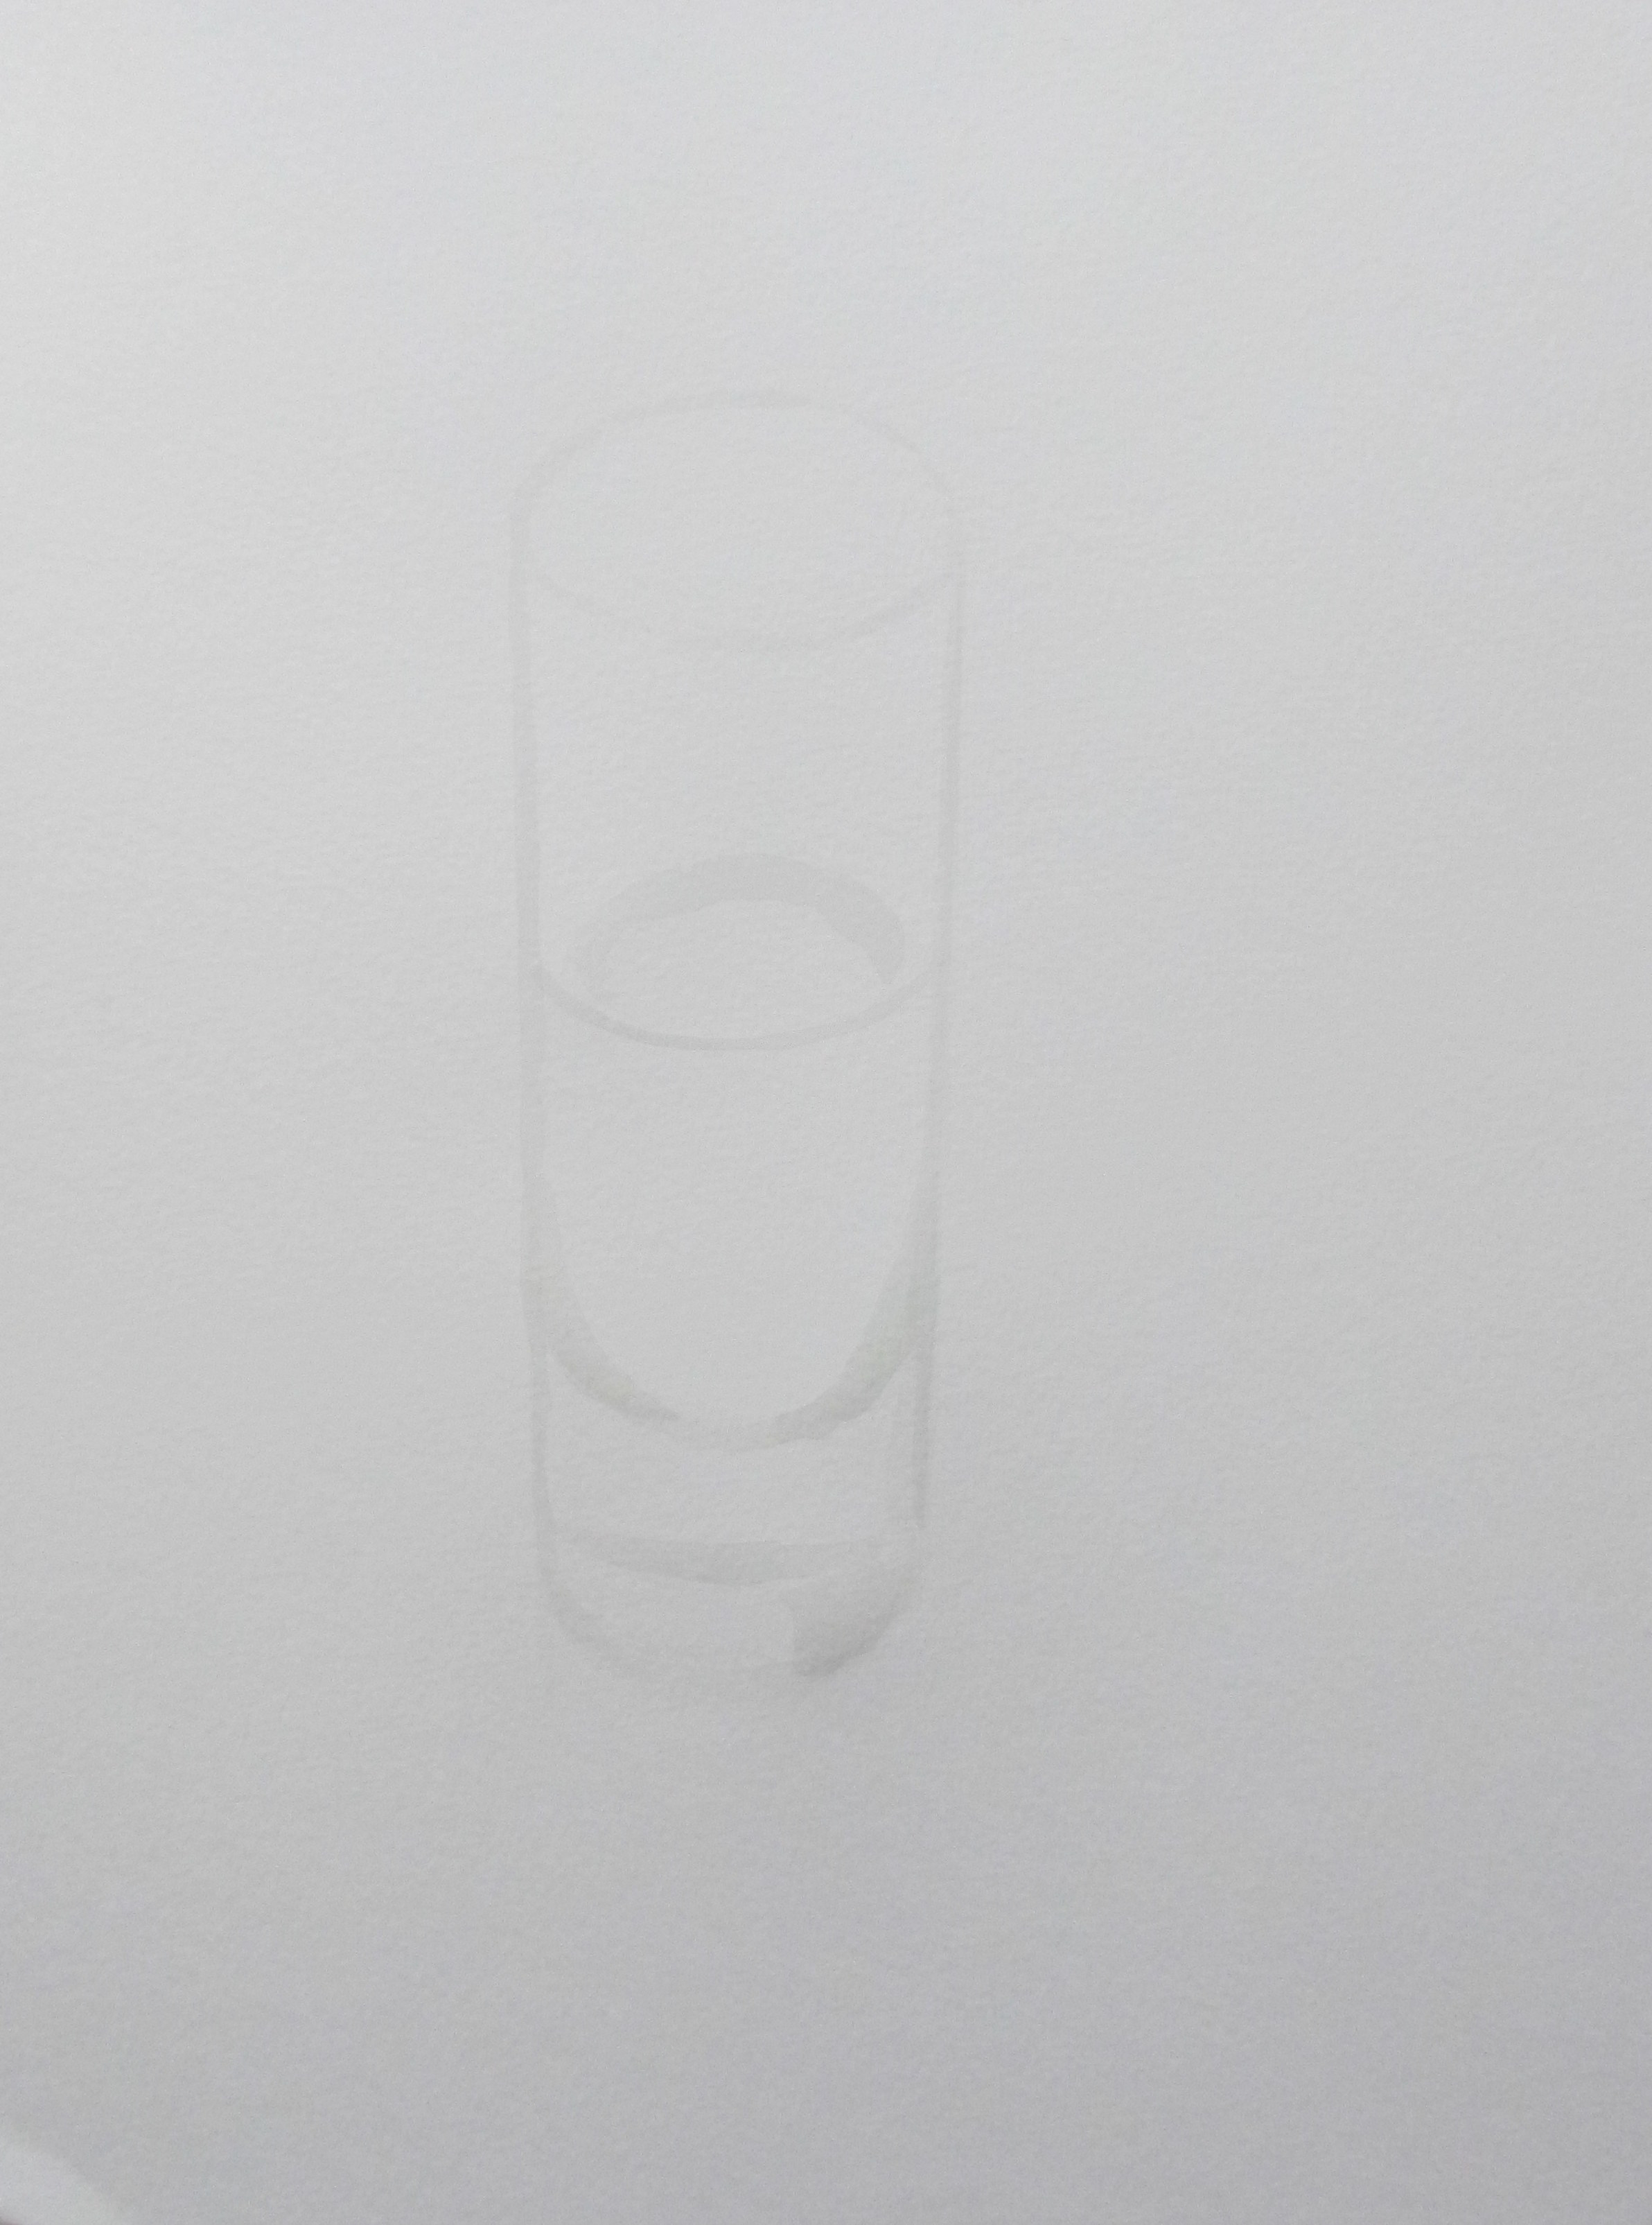

Step 1 – First I start with a very faint outline of what I’m painting. I work from life and I generally just freehand the outline so I tend to spend a lot of time on this part. Getting the basic shapes right at this stage is very important since it usually can’t be fixed later on, especially in watercolour. I take a short break when I think I have it about right and then when I come back to do the next layer I can immediately see if it any adjustments need to be made to the outline. Using a very faint, barely-there colour means that at this point you can just paint over any mistakes (I do this with acrylic paintings too, starting with a very watered down yellow ochre outline — using pencil seems to just make a mess and muddy my colour).
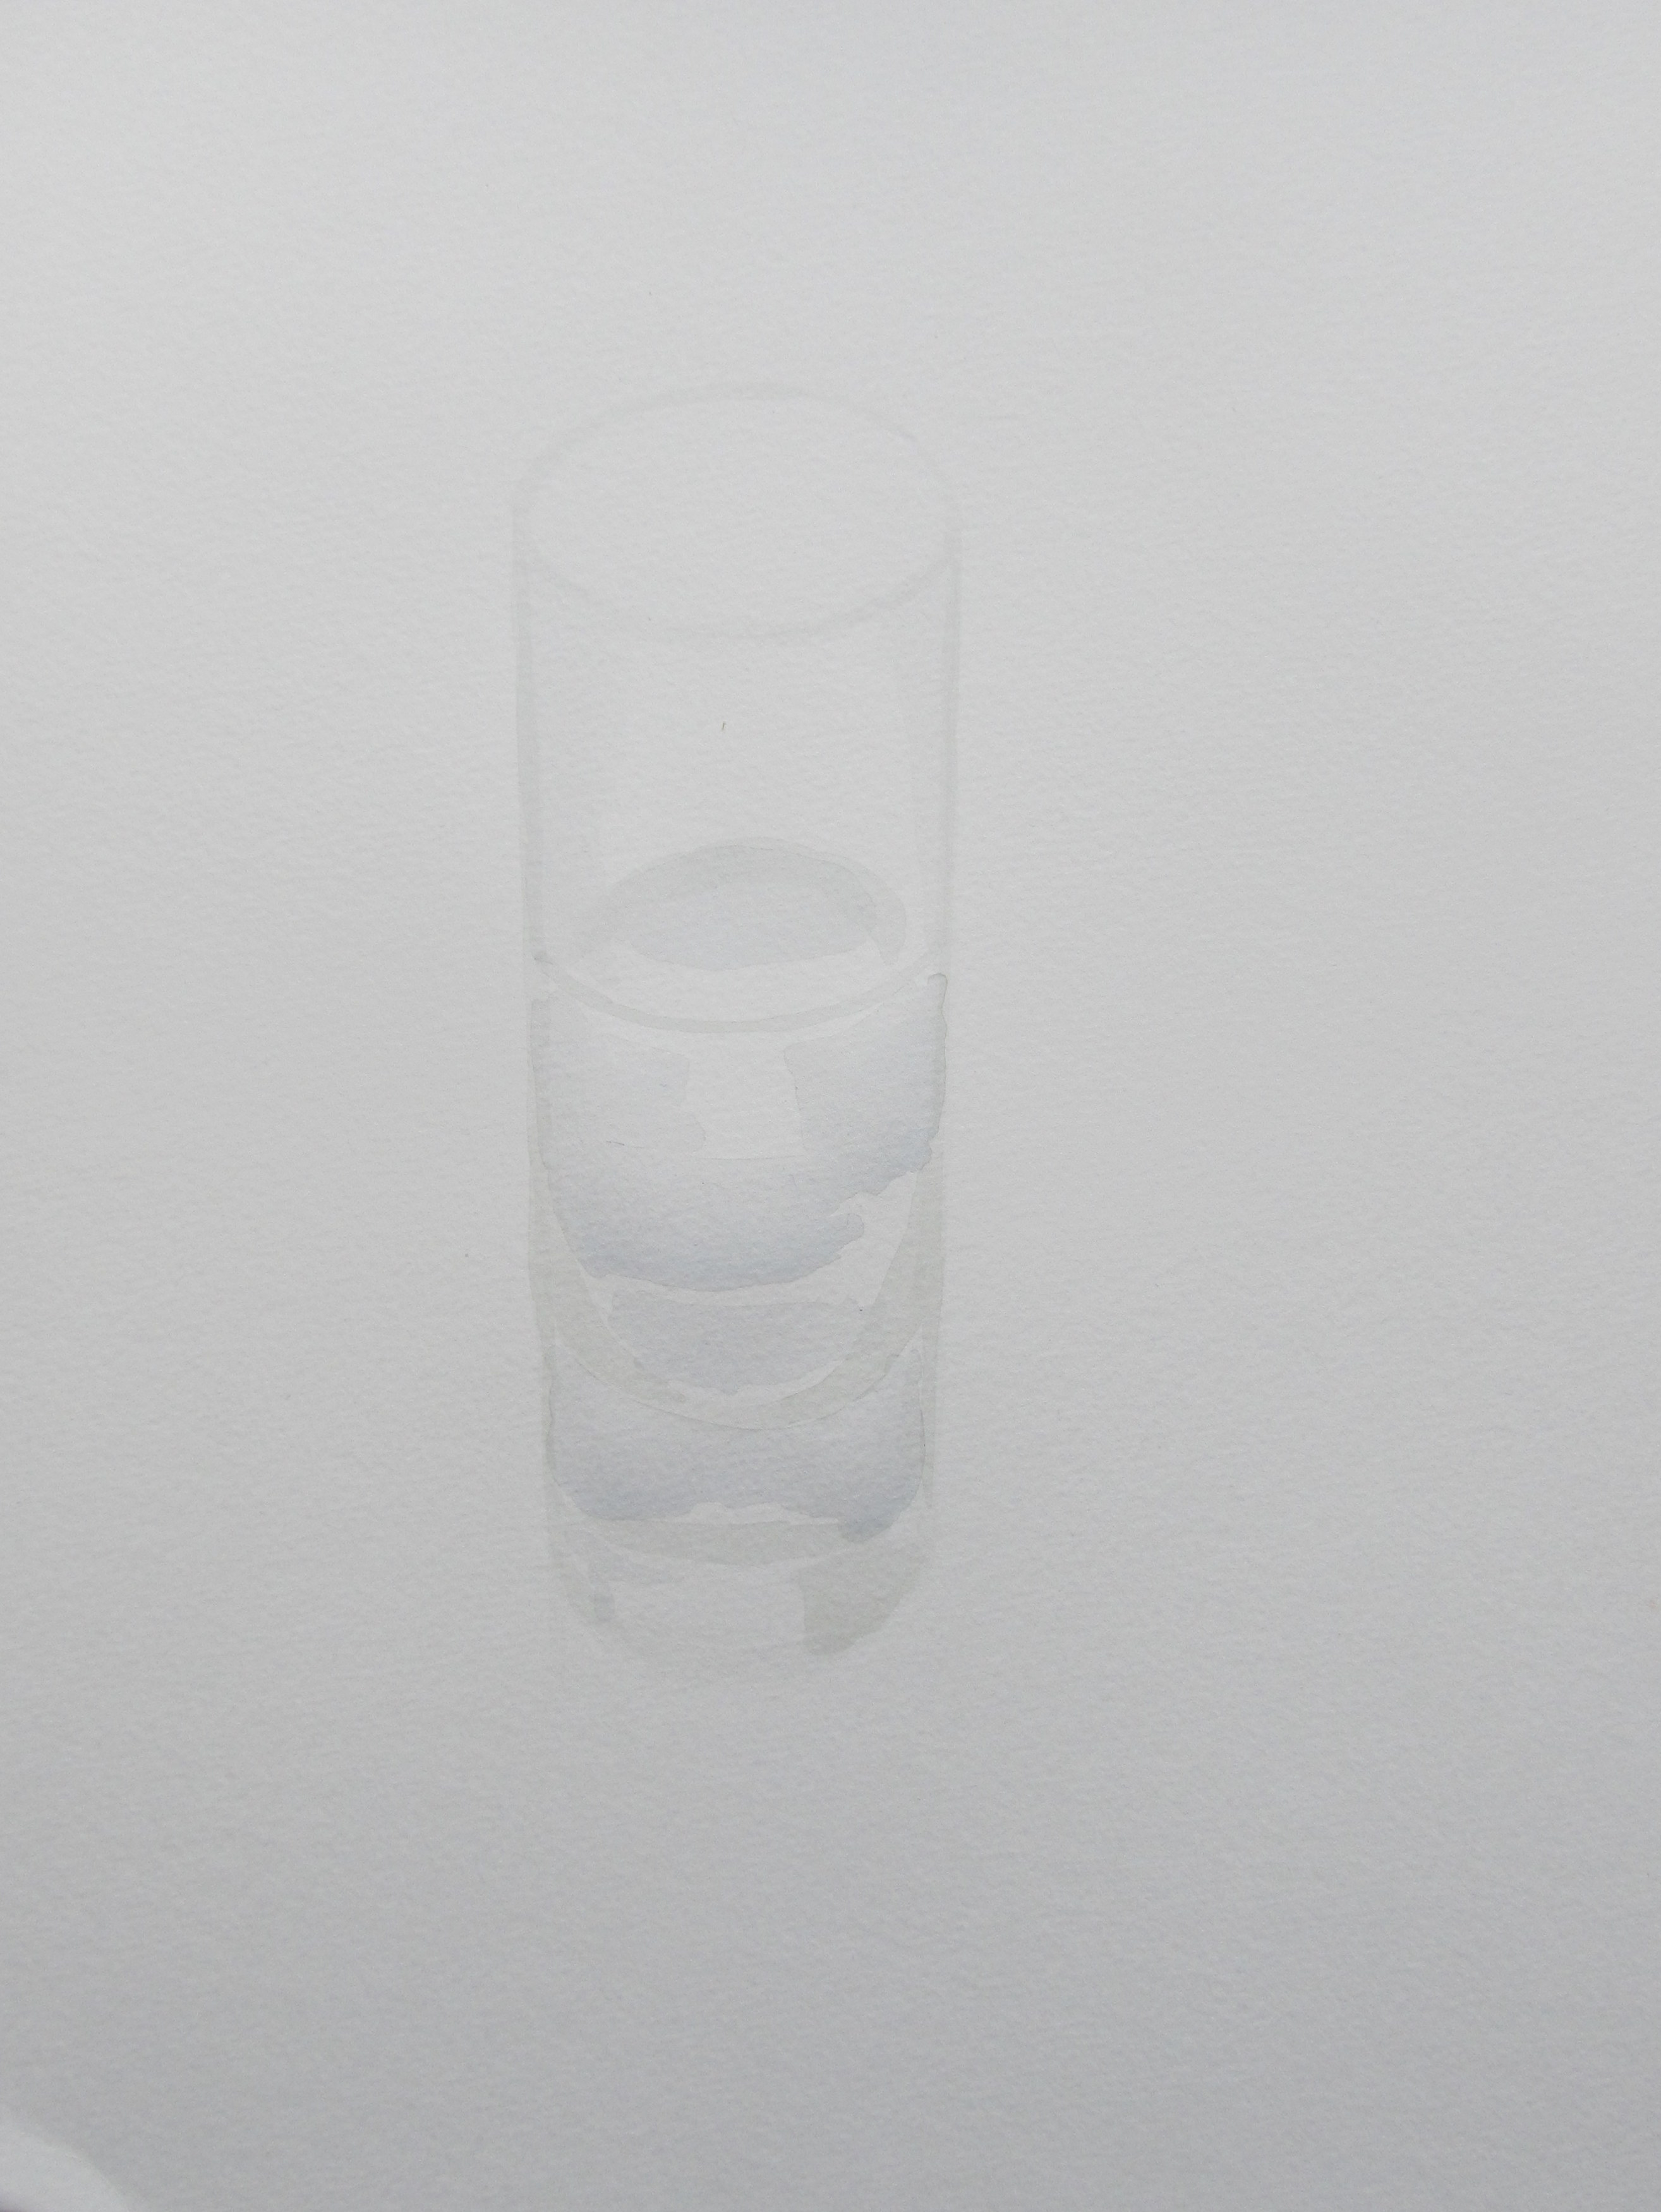
Step 2 – Block in the lightest areas of colour (generally I work from the lightest areas to the darkest).
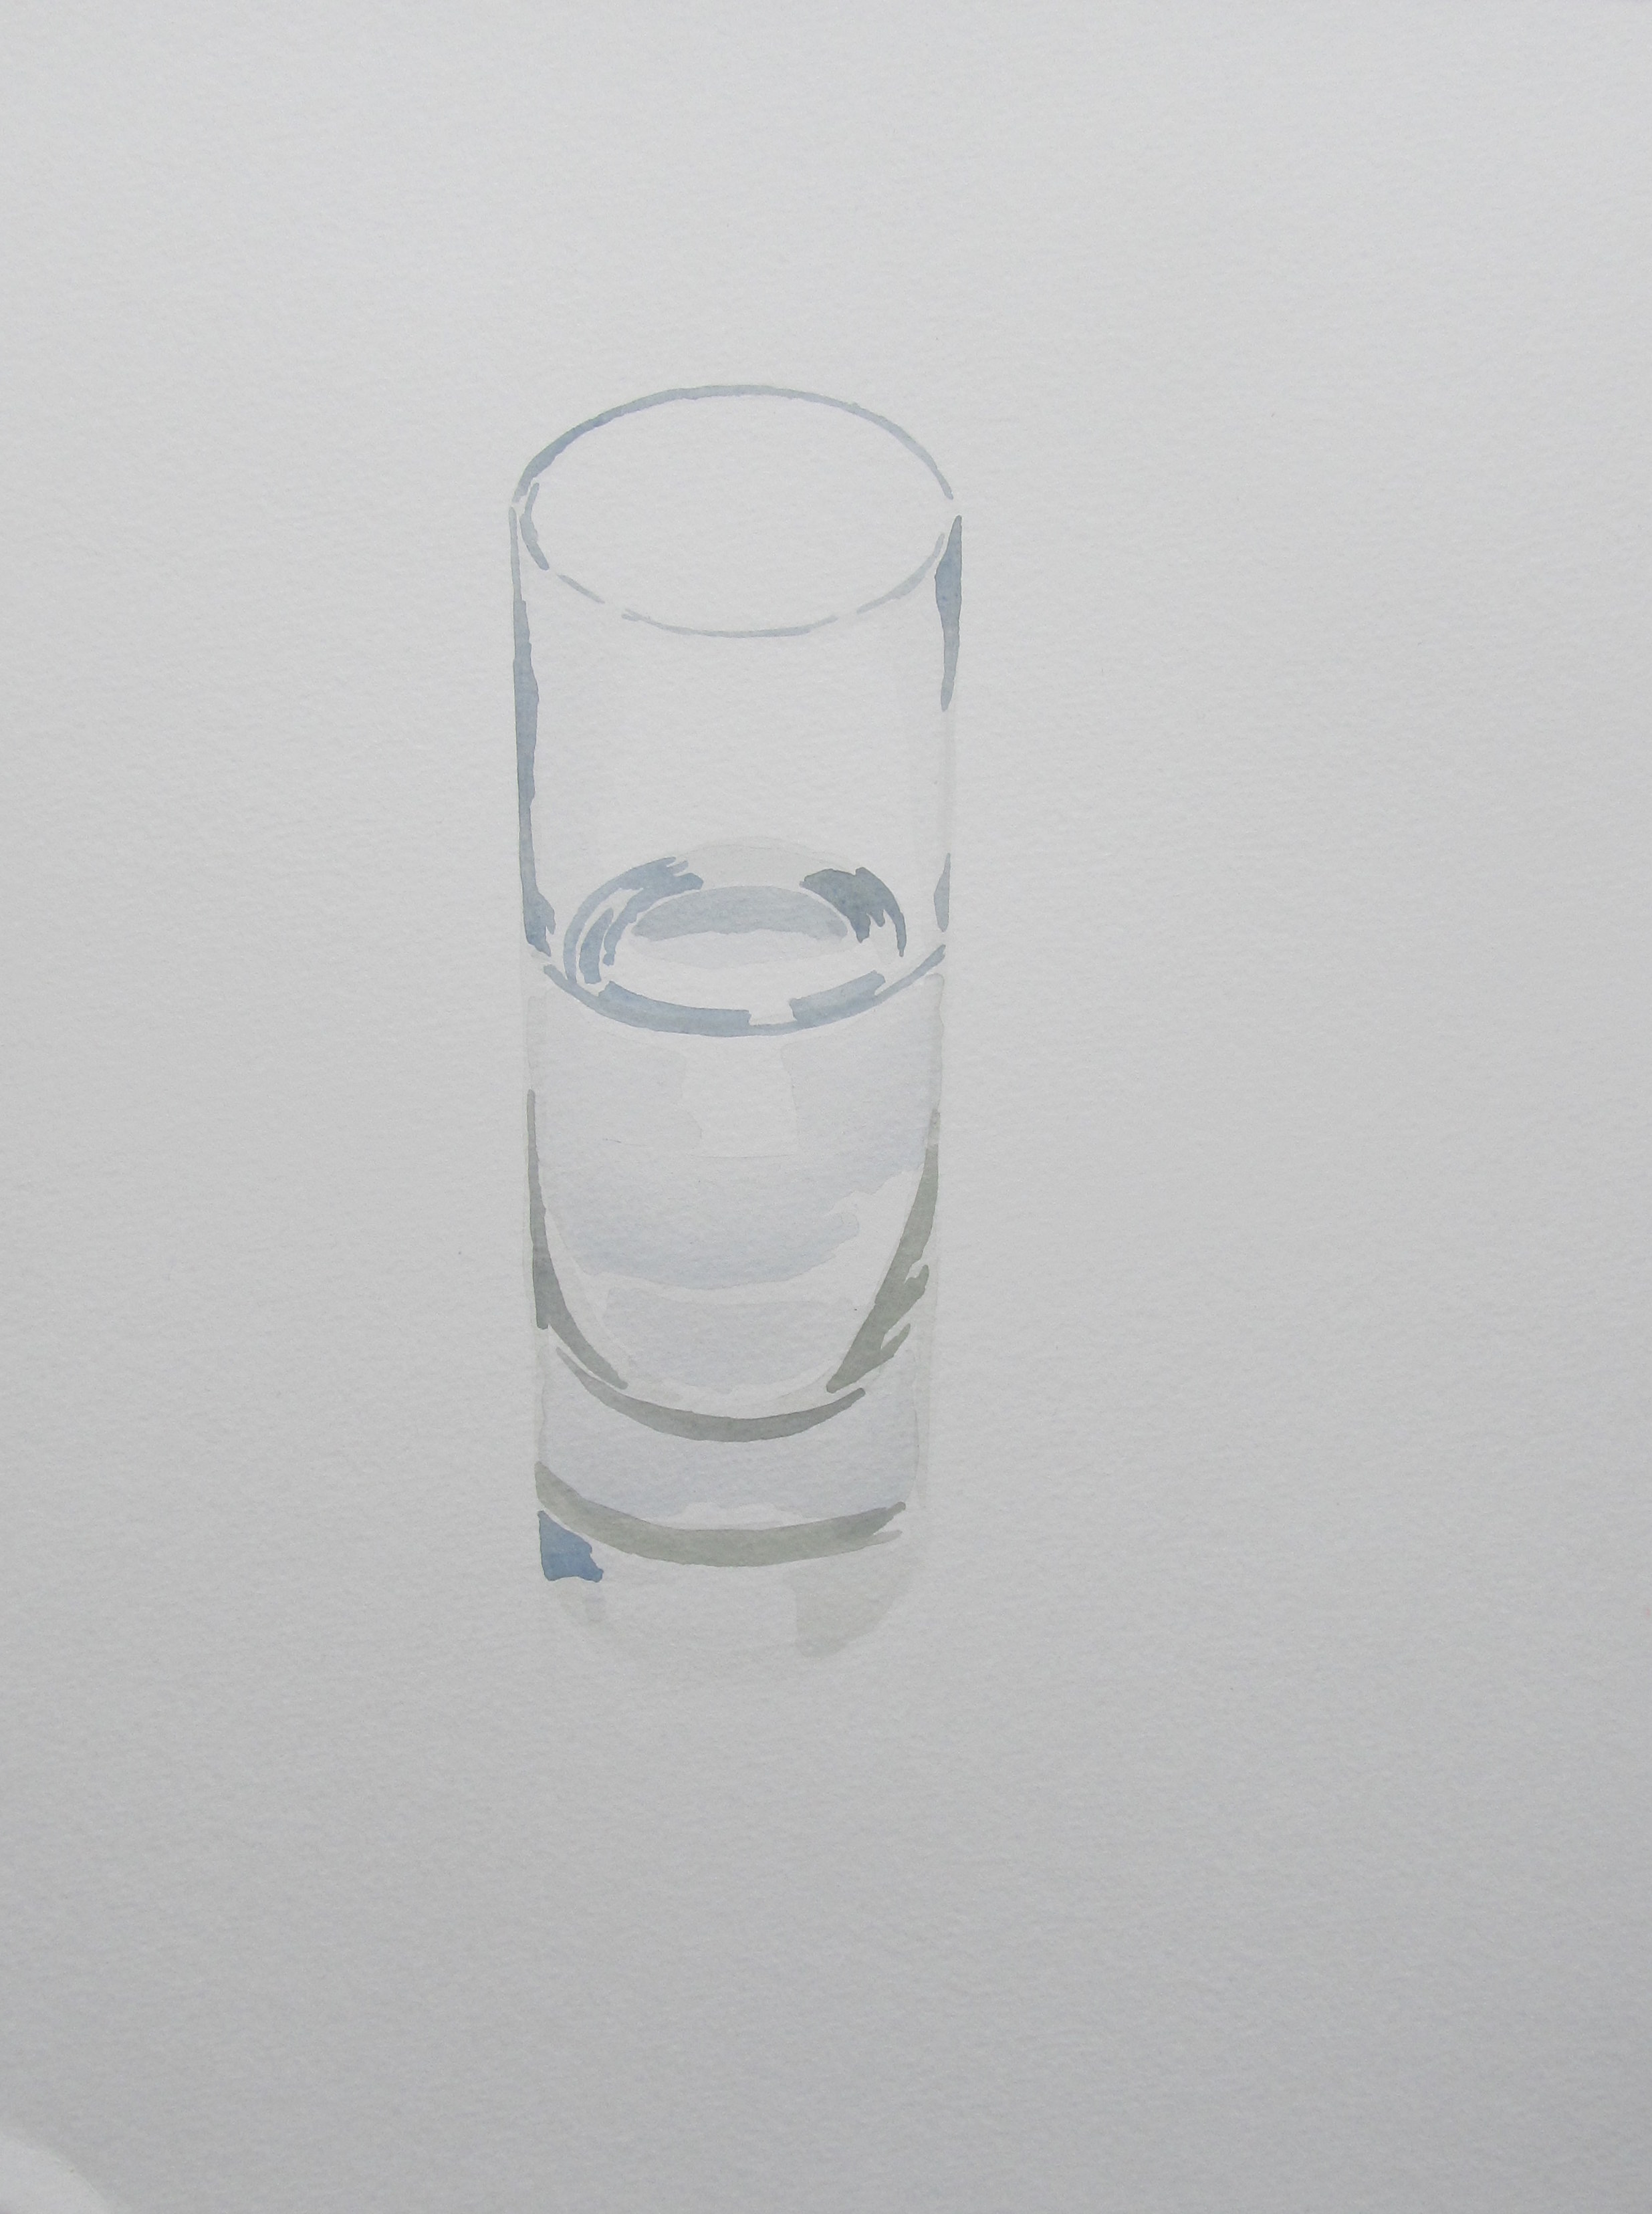
Step 3 – Adding the mid-tones. On this glass that meant mostly adding outlines to the basic shapes of the glass and water.
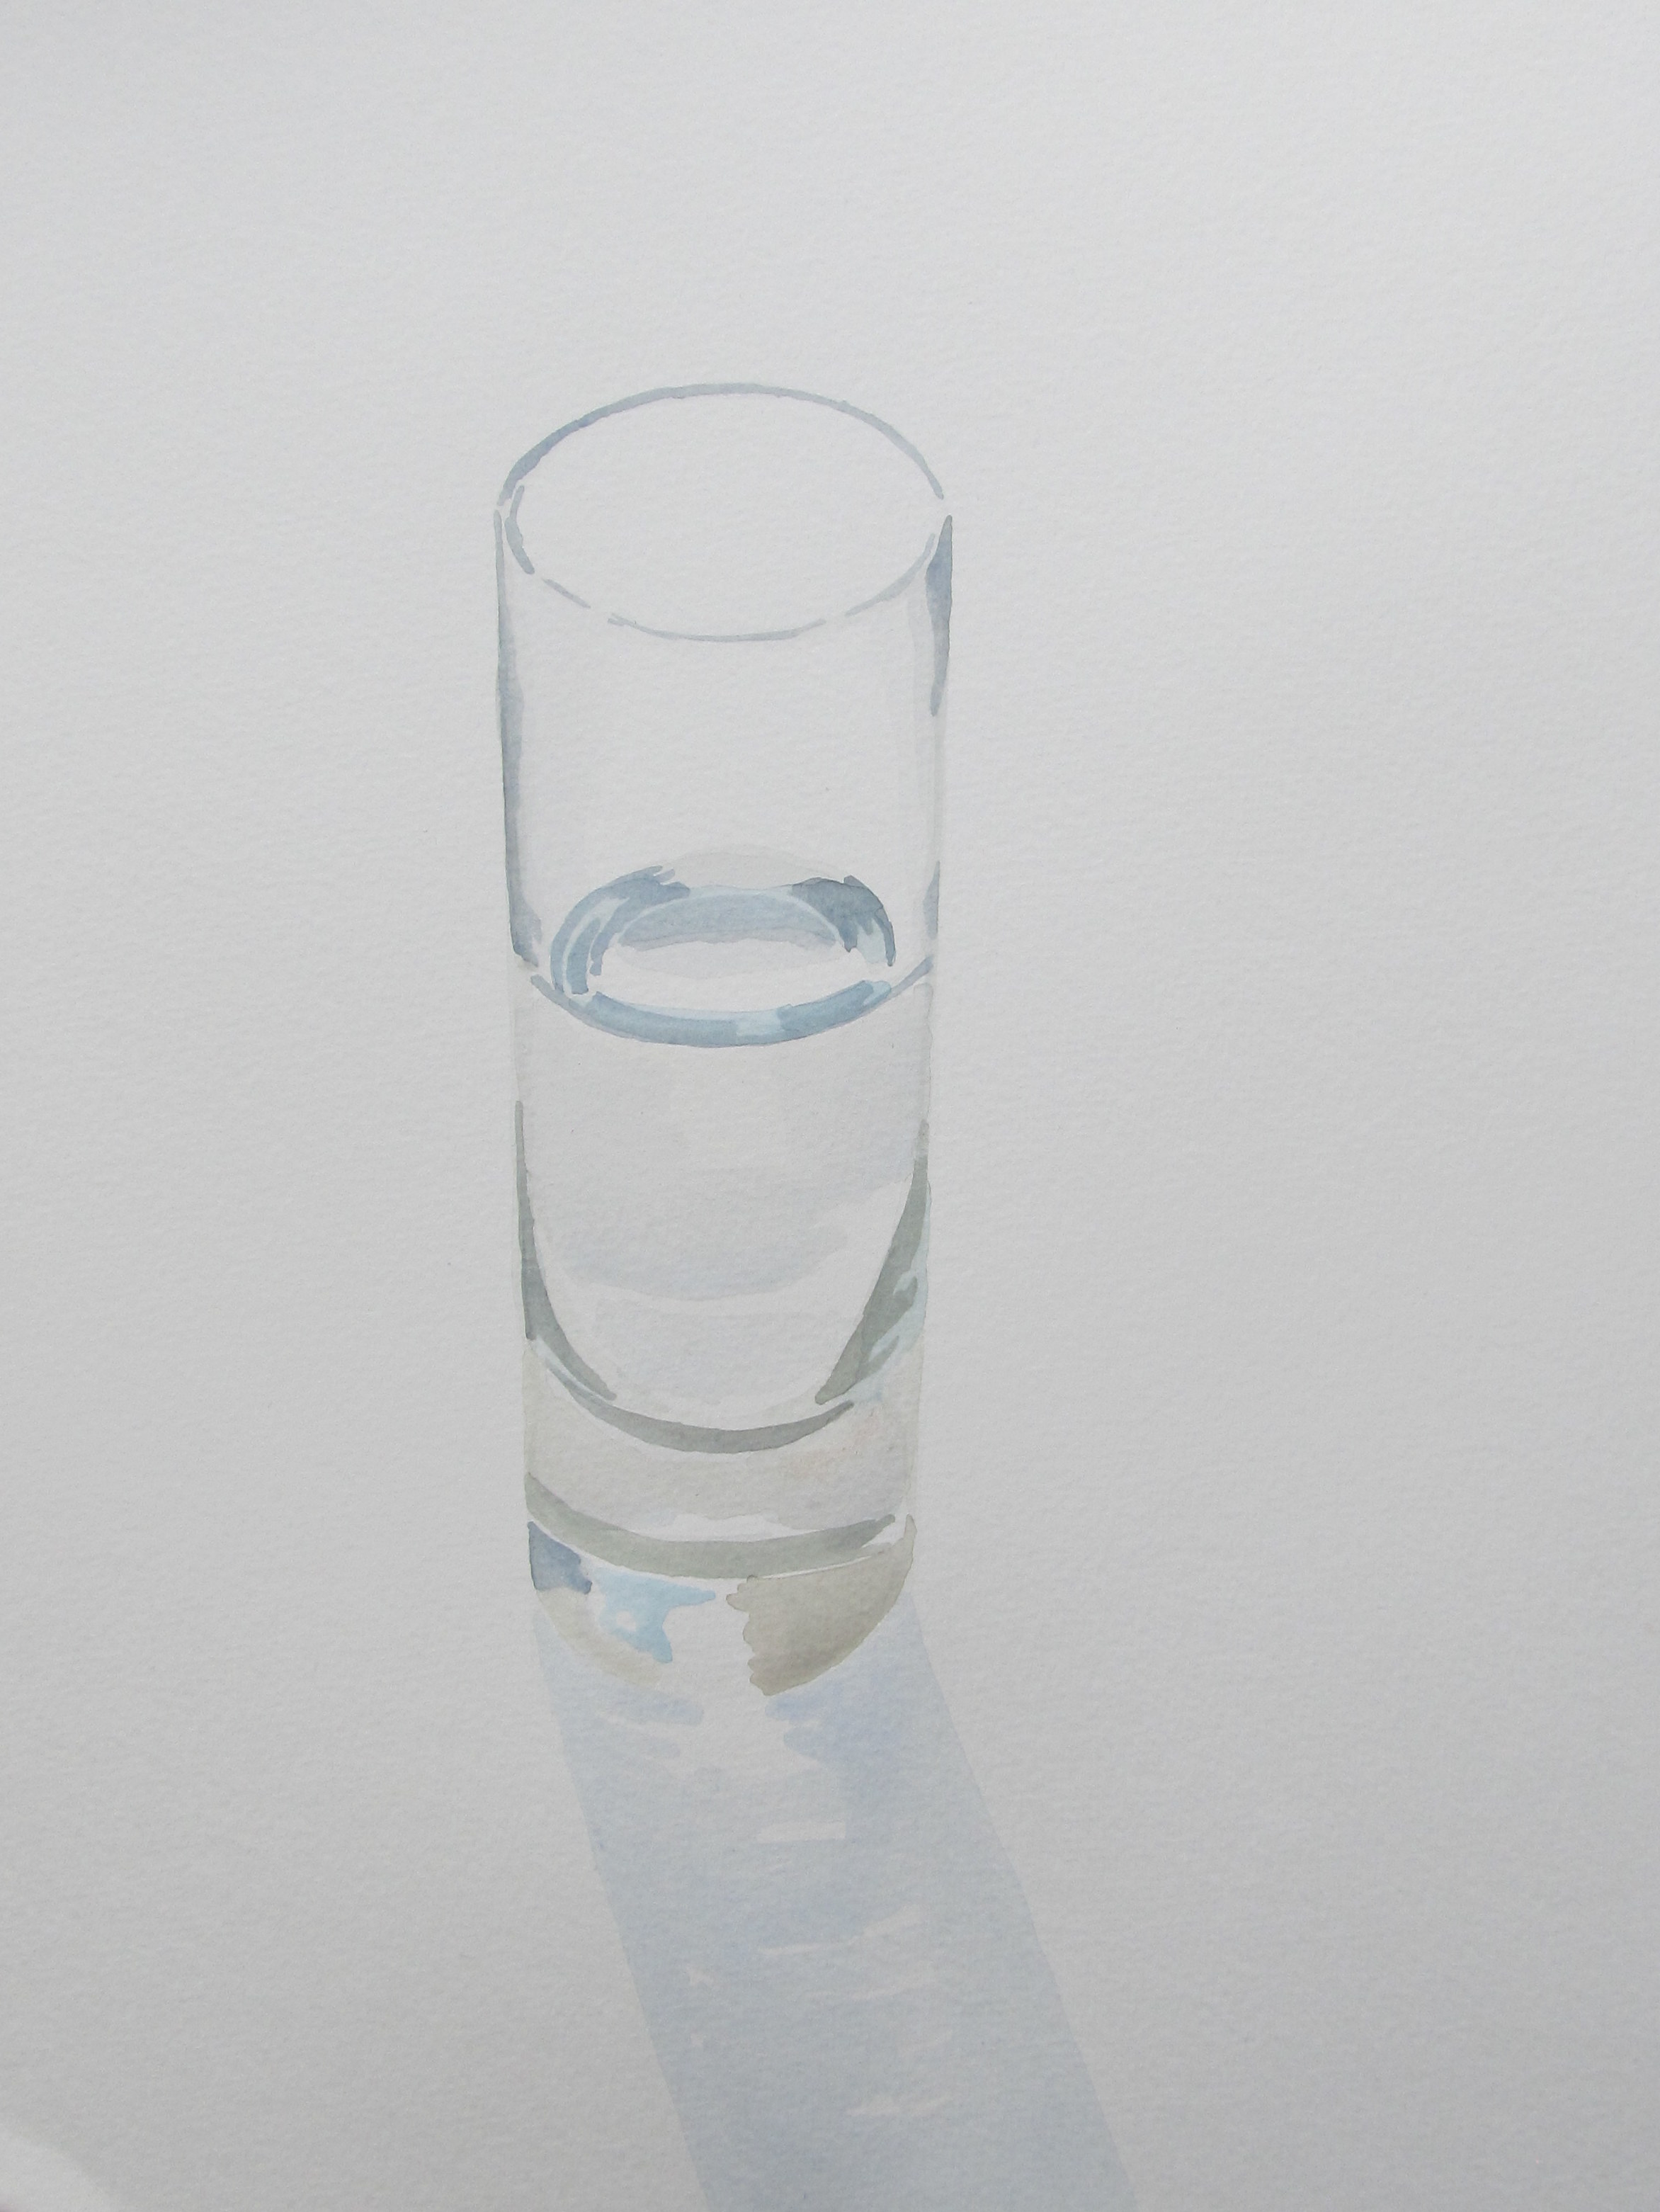
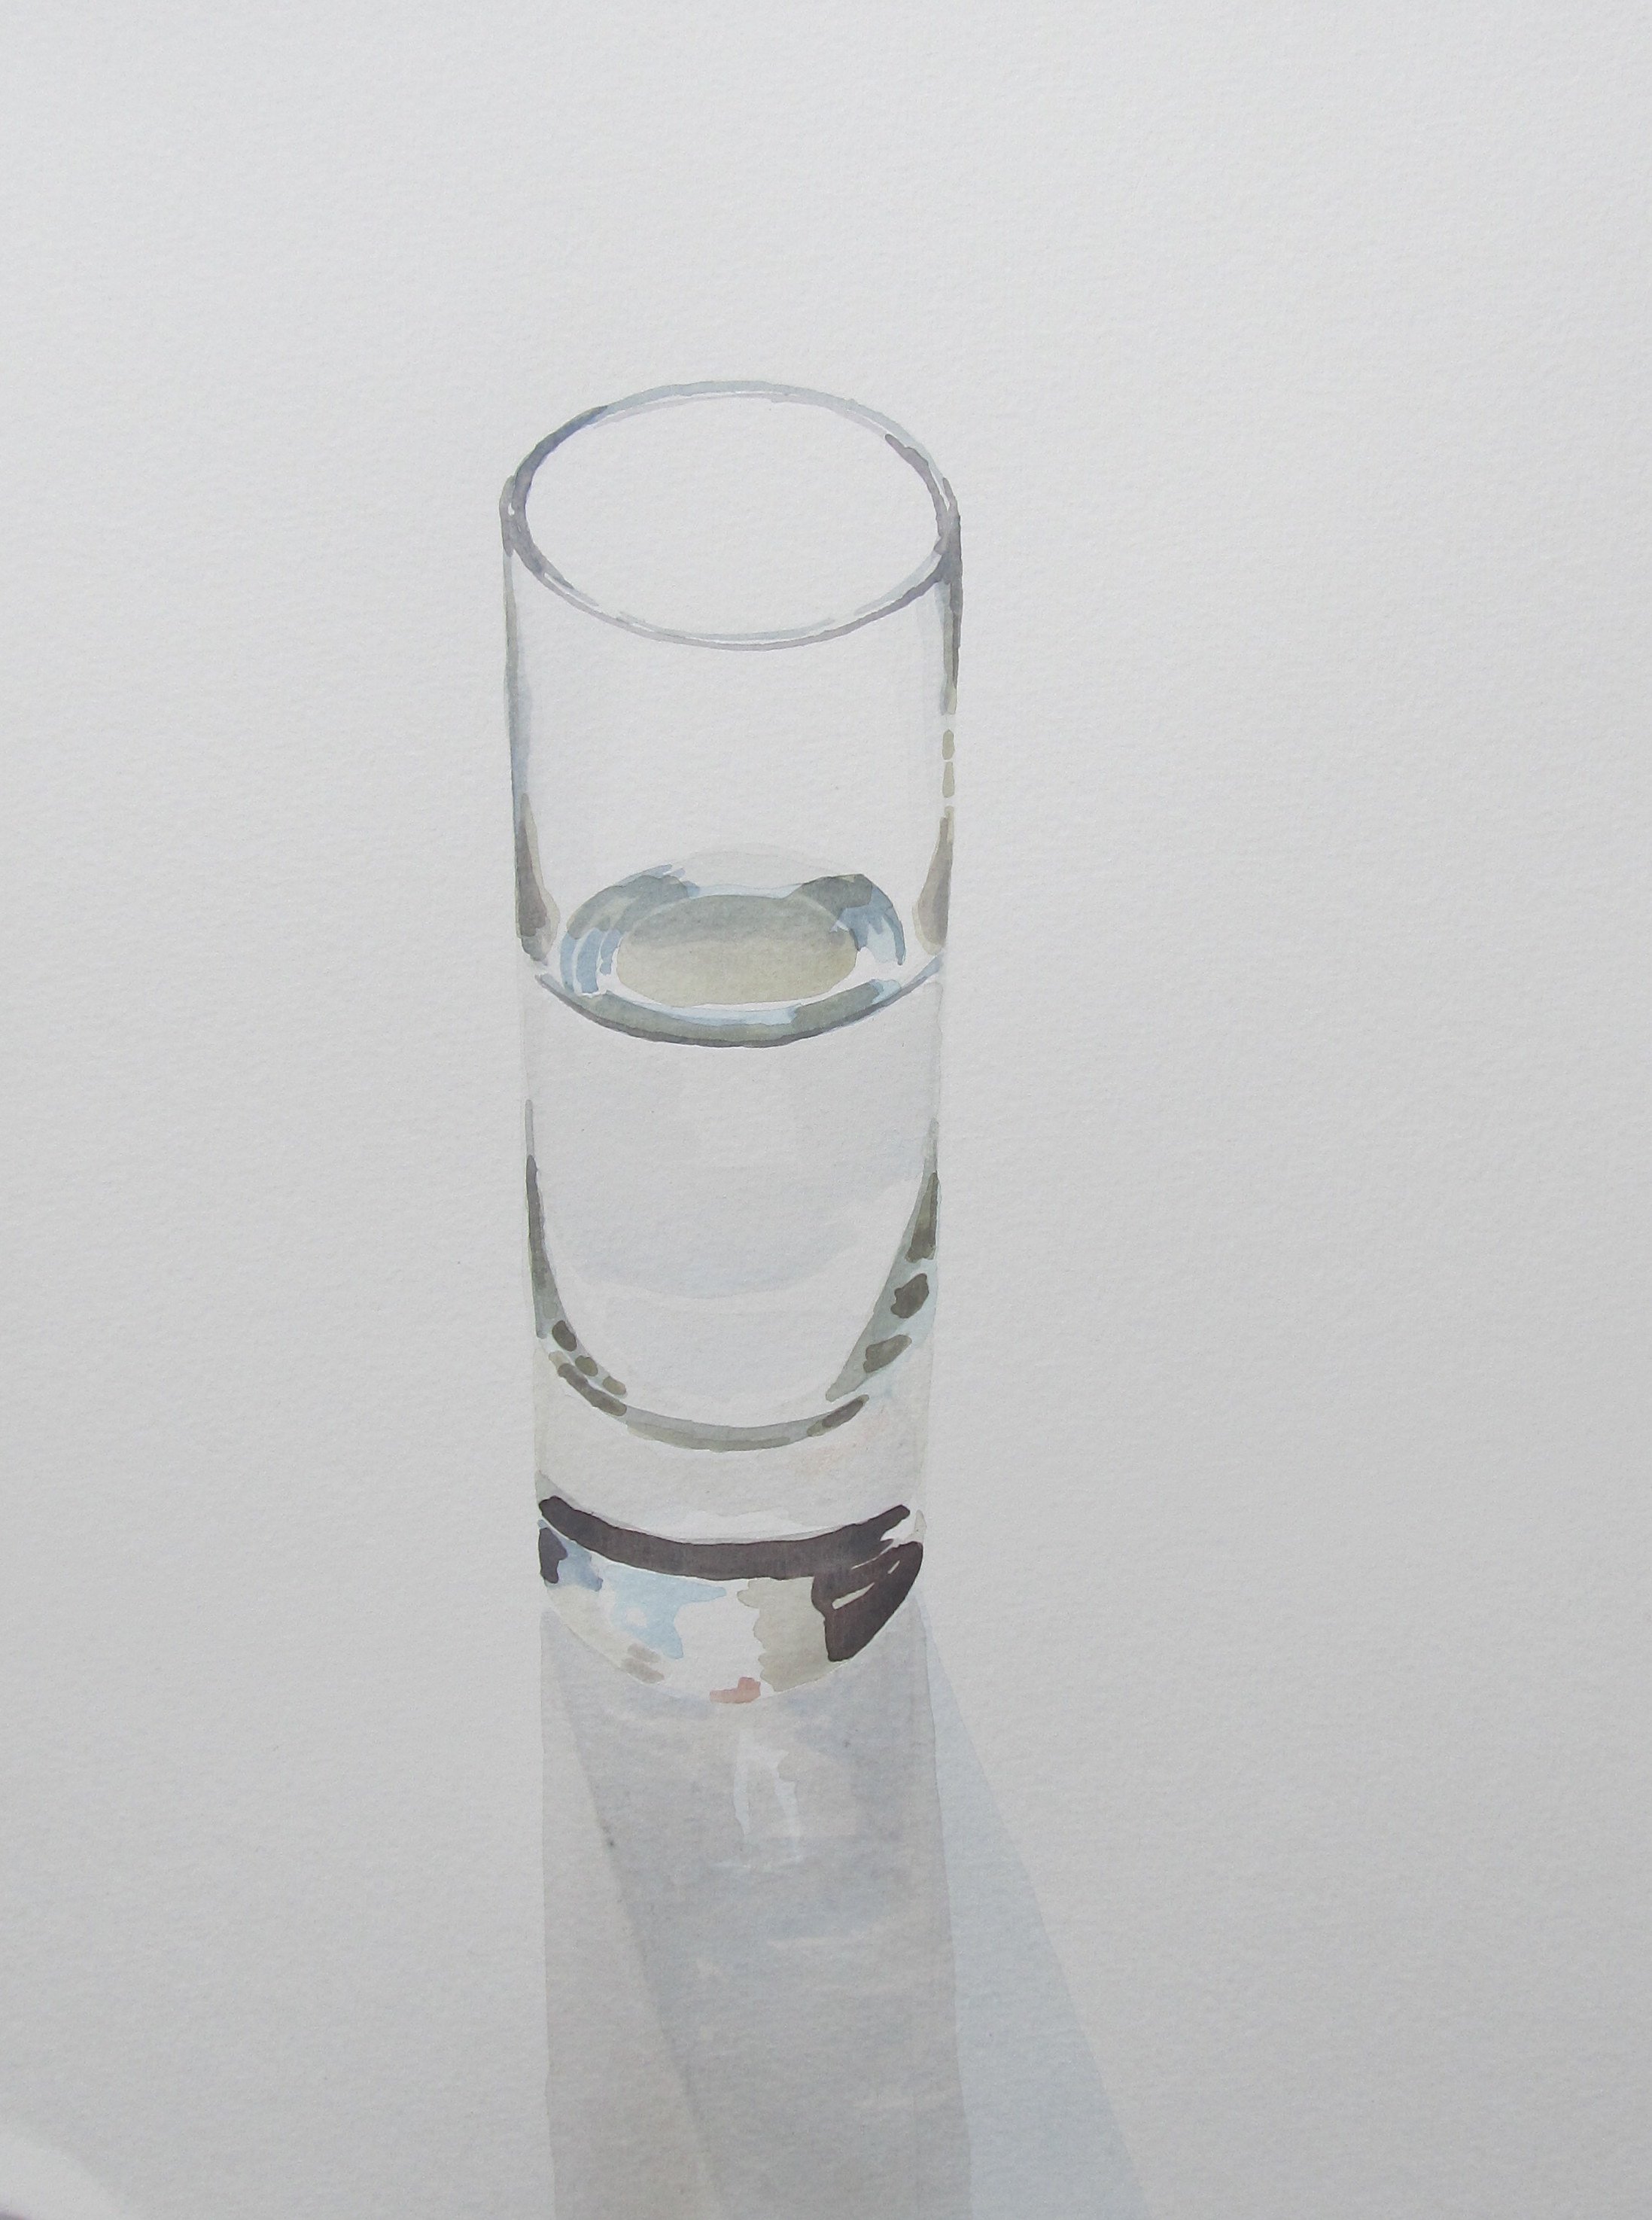
Step 4 – At this point I added some of the other colours that I was starting to see in the glass and water — mostly some turquoise blues and warm browns. And also one shadow of the glass (I had two light sources on this so there are two crossing shadows).
Step 5 – Adding some dark tones and the second overlapping shadow. These were almost the last, darkest tones and when I was painting it I was sure I had ruined it at this point by going too dark too fast. I tend to be a bit impatient and like to work quickly. It’s one of the things that I am learning not to do with watercolour where you have to wait for each layer to dry. So I took a bit of a longer break here so as to not wreck it any further by anxiously trying to “fix” it. It’s best to just take a break sometimes.
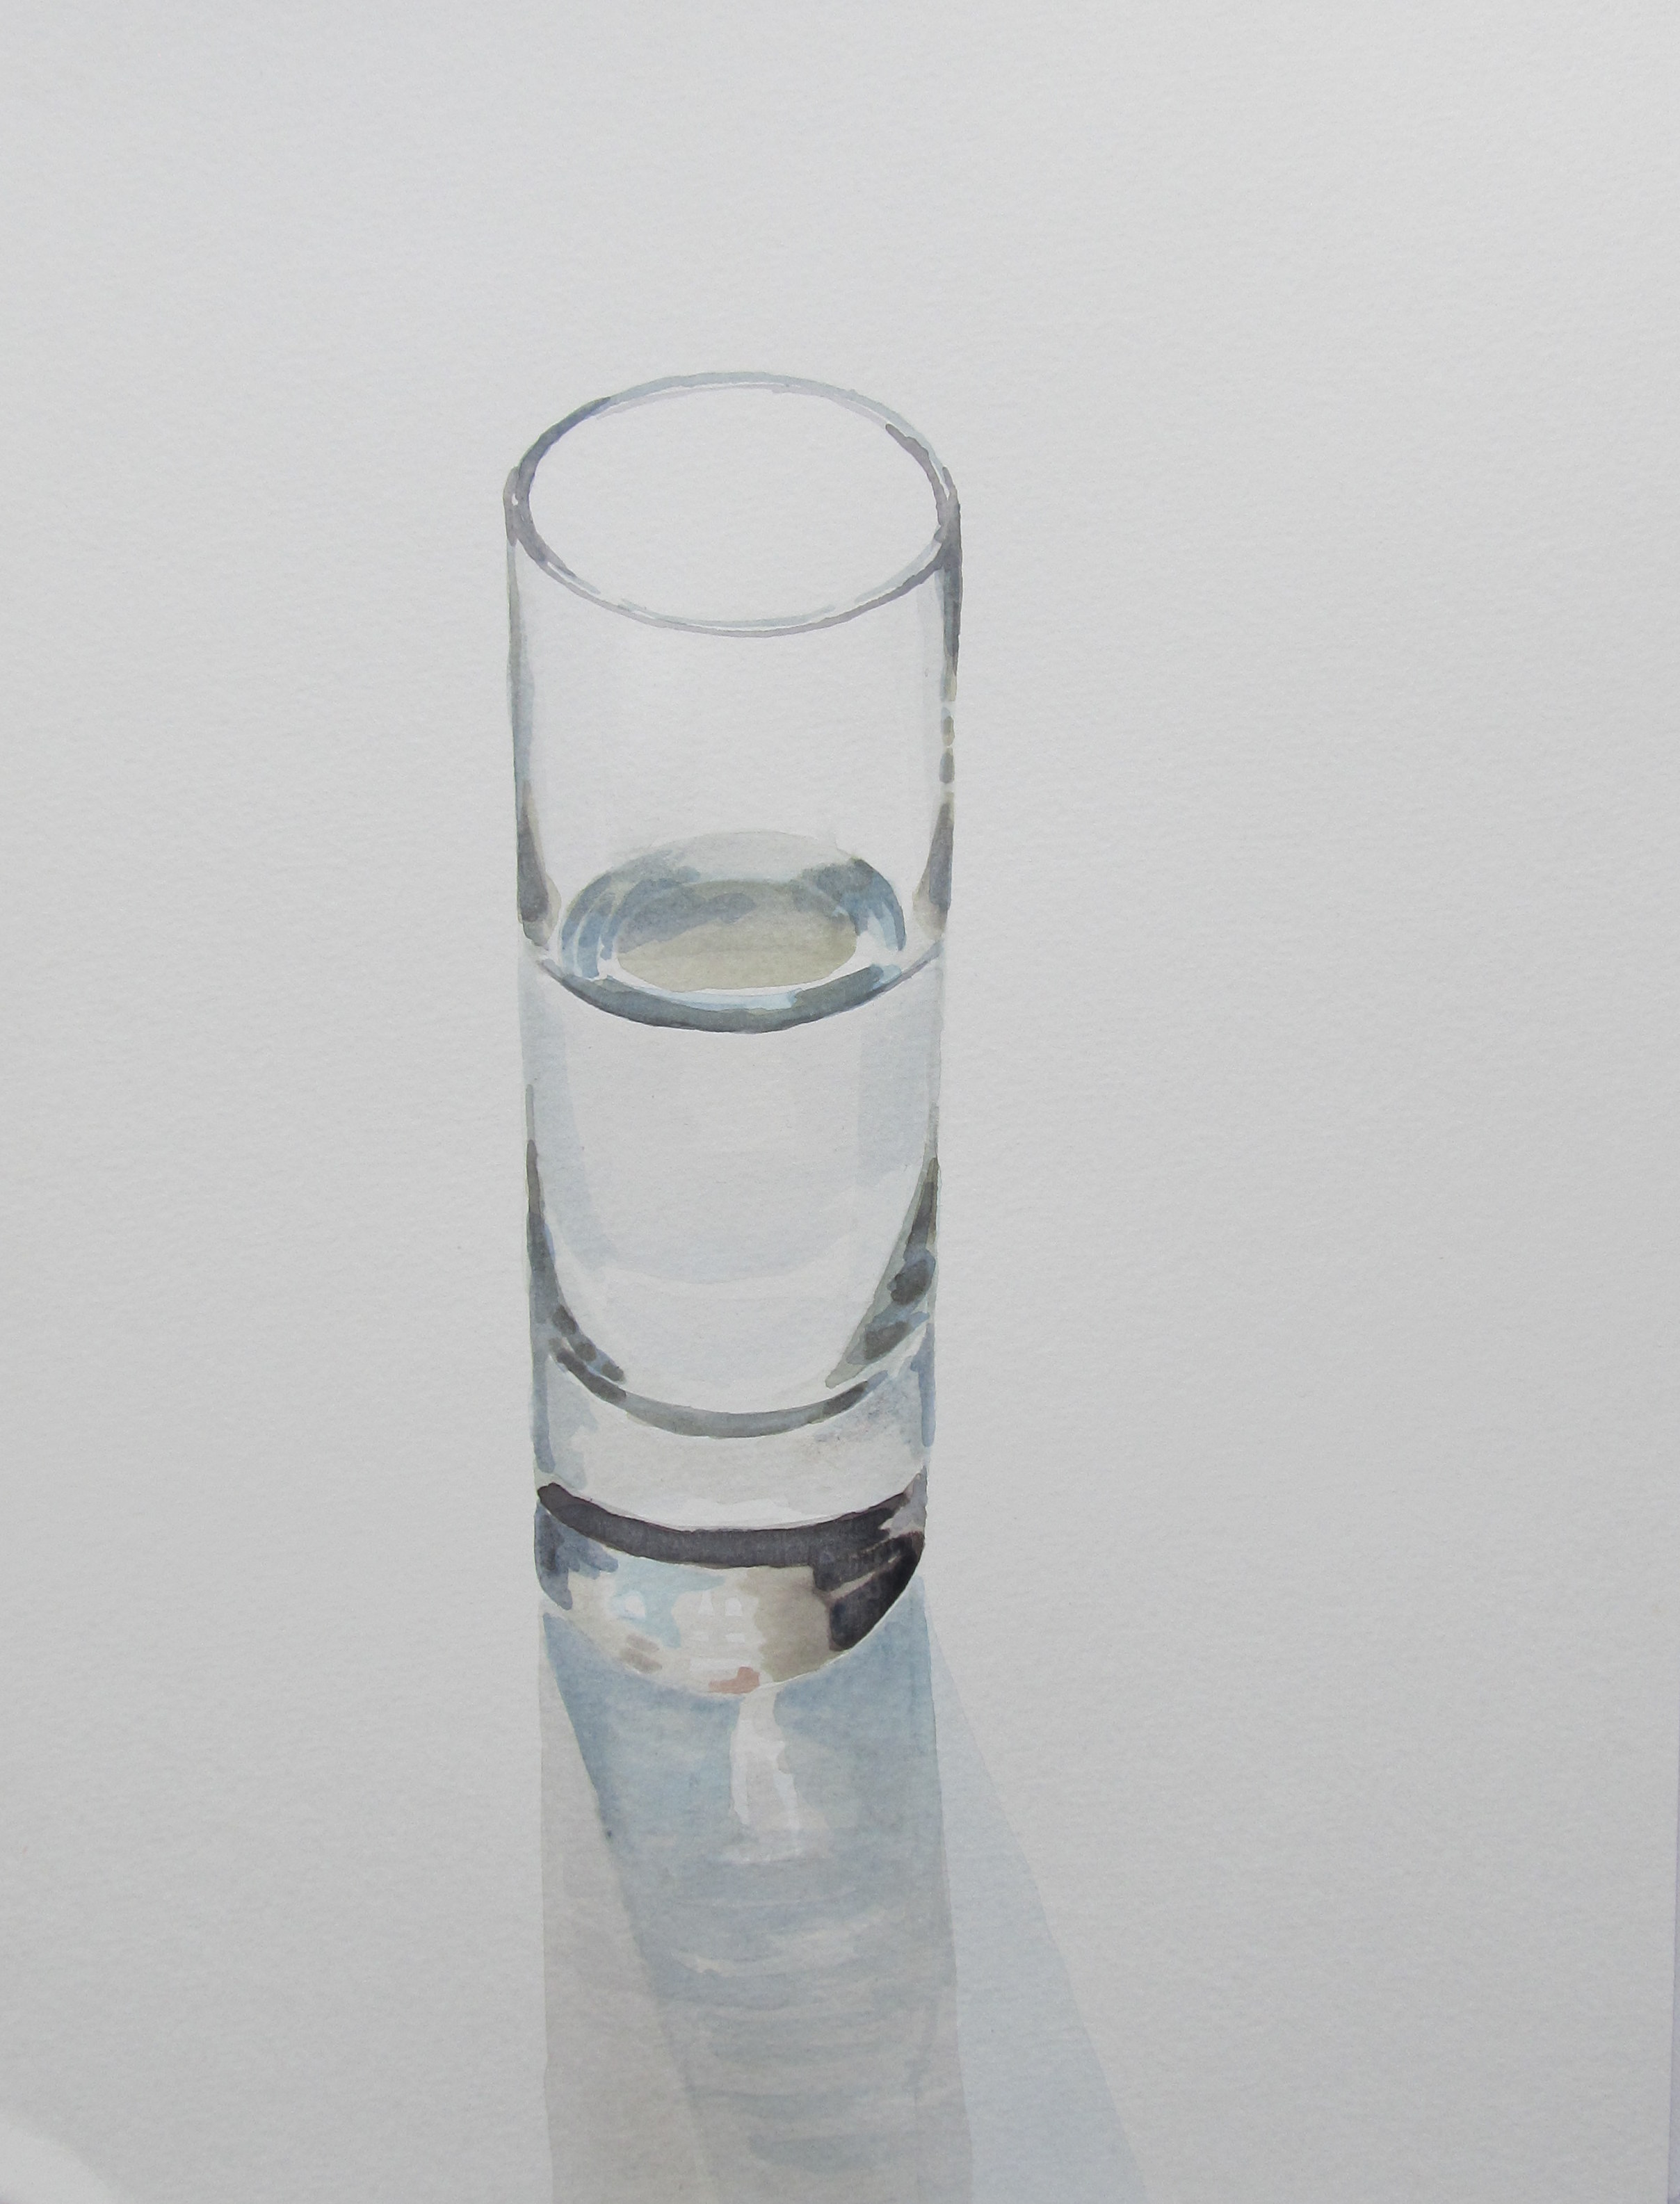
Step 6 – Added another layer of mid-tones (which probably should have been done before I did the dark tones) and darkened the center of the glass’ shadow.
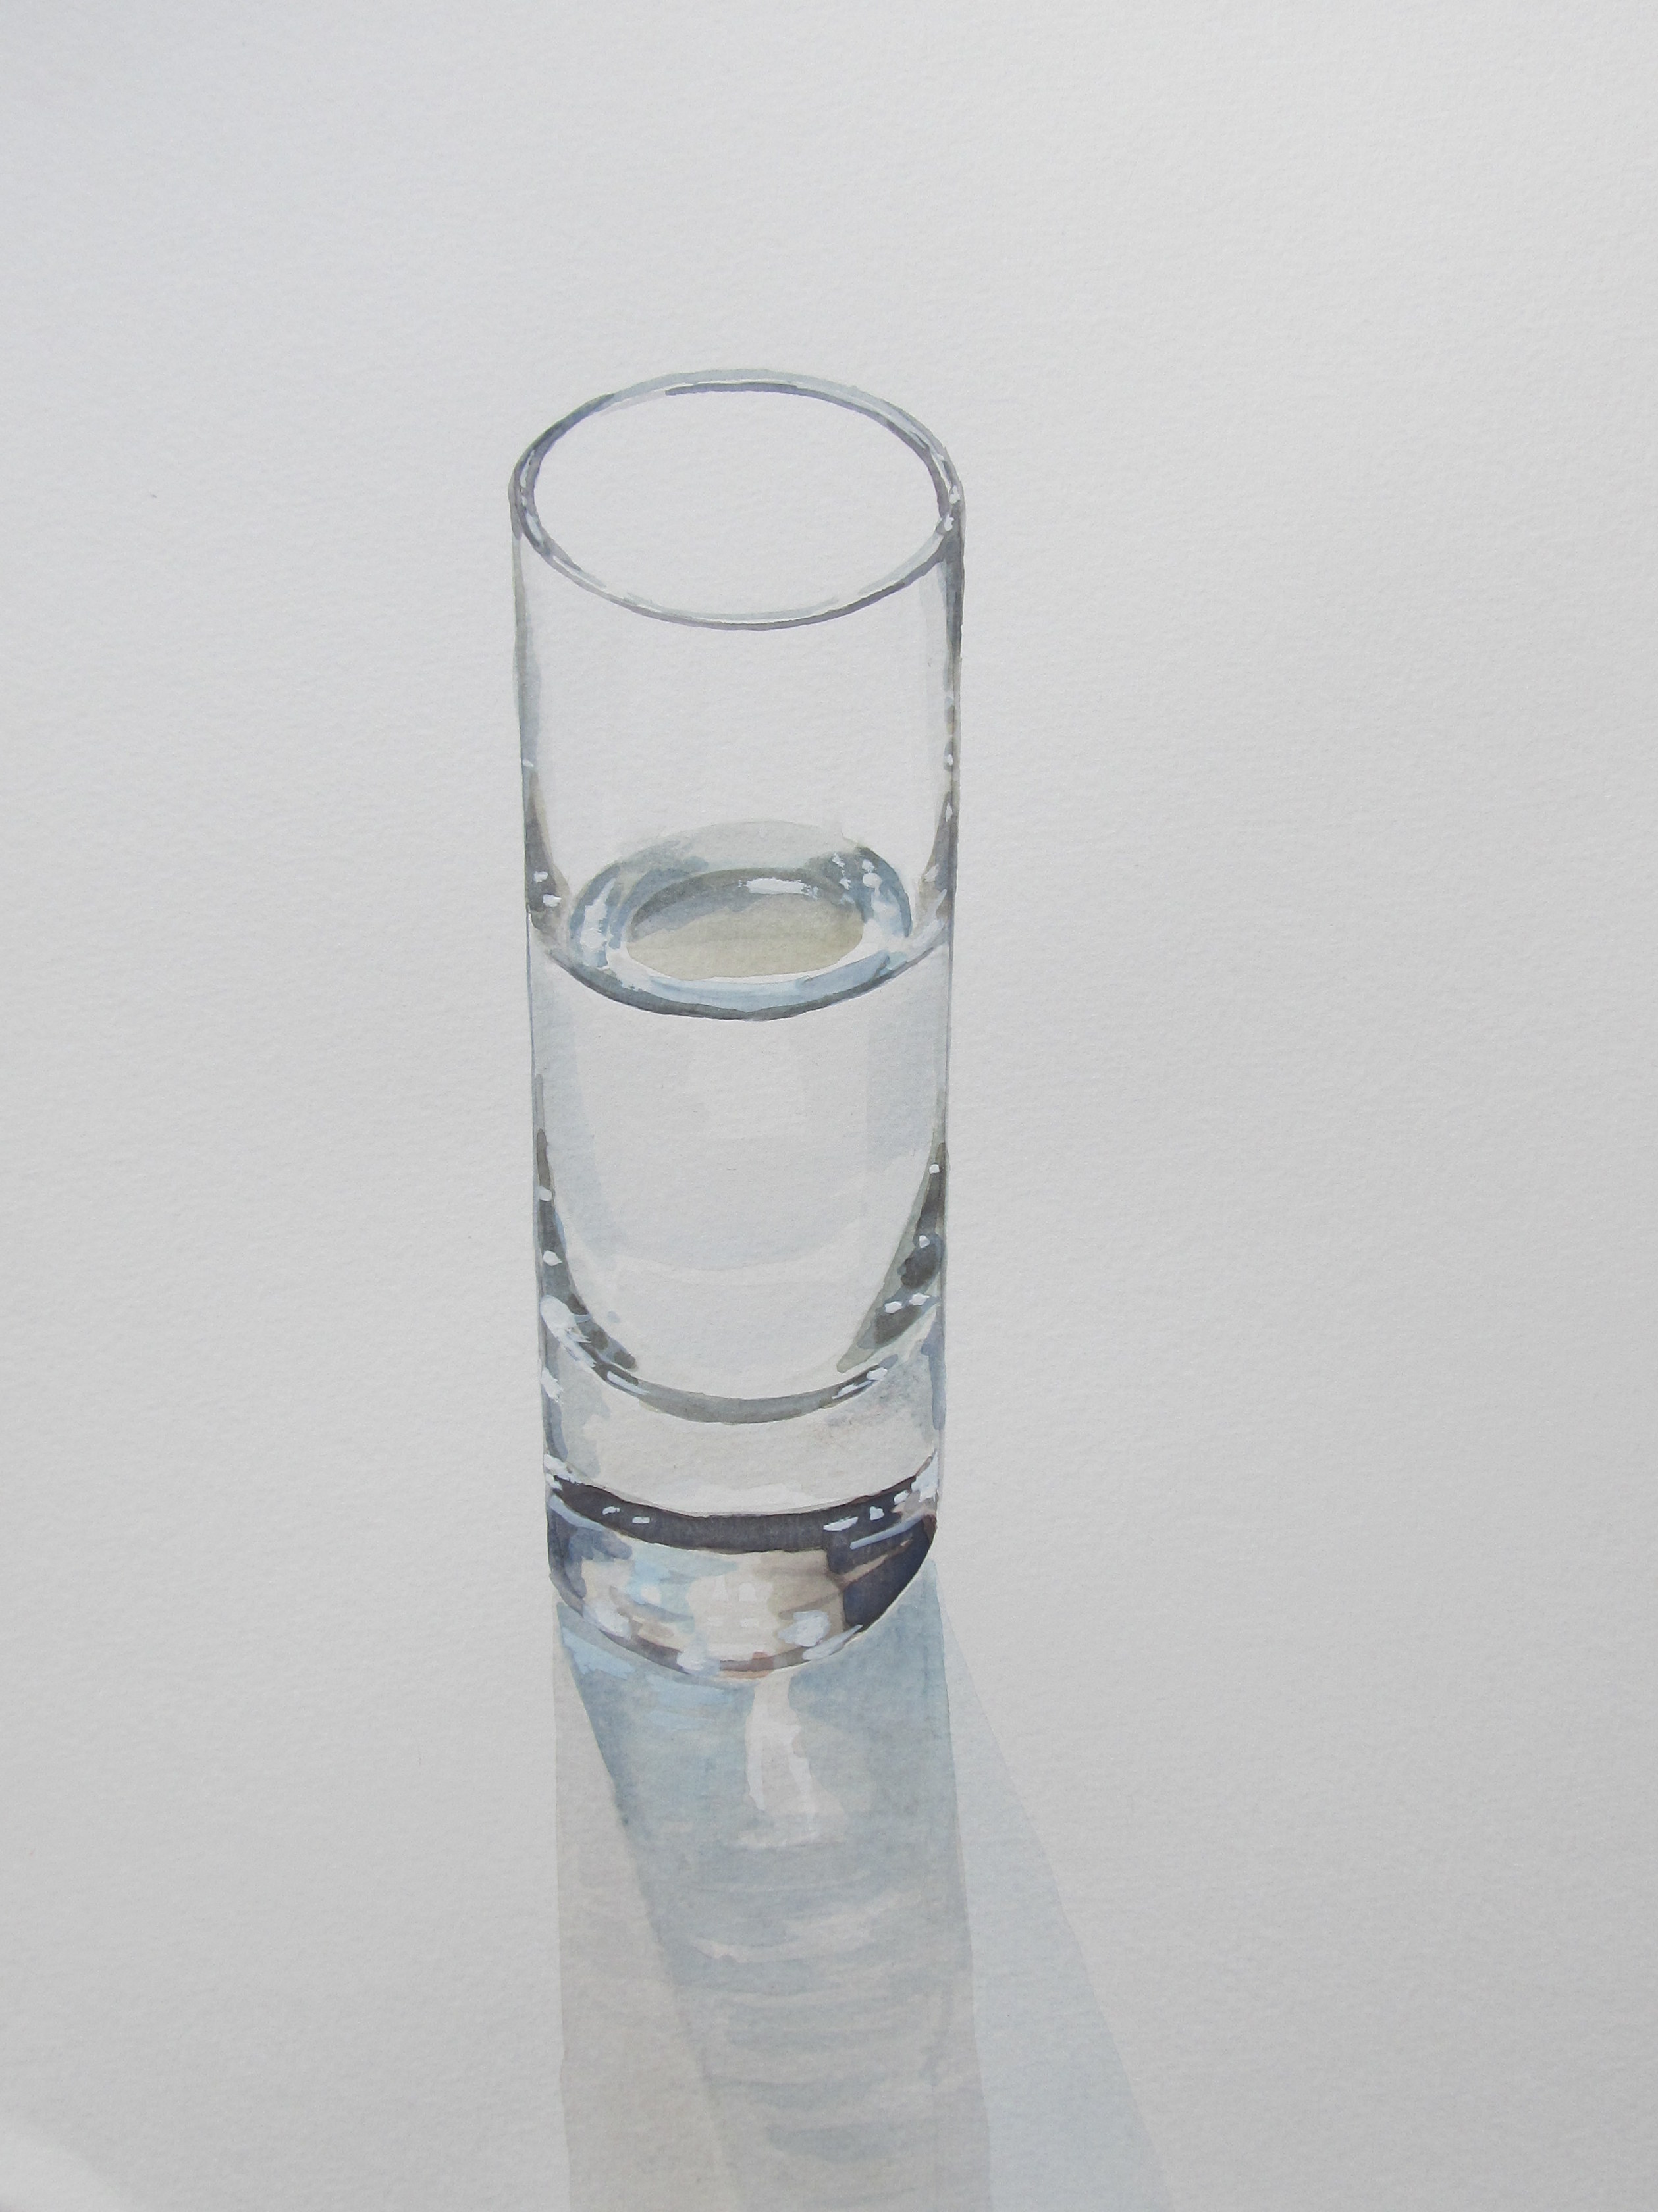
Step 7 – Did the final tweaking, mostly to the top of the water and the bottom of the glass, and added all the white highlights throughout. I’m still learning how to use white in watercolour. I’m finding that the trick is that it only shows up on painted areas, it usually is actually darker than the white of the paper, so I do a mix of leaving unpainted areas for highlights and adding white paint to painted areas to really punch up the contrast. It seems to be just the juxtaposition of light and dark that makes the white paint appear to be super bright highlights when in reality the white paint is quite dull.

This is amazing. I love seeing the process. Just beautiful, Dayna!
Thanks Dieu! I always find it neat to see in progress photos of paintings. I should do it more often.
Beautiful as your transparent items always are.
Thank-you for the descriptions, I will certainly try this. Could you possibly add a gallery to the post? Then one could “leaf” through the illustrations step by step.
Thank you :)
I was trying to do them as a gallery but the option seems to have disappeared. I’m not sure if it is just my theme or not, I’ve been browsing other themes because I would really like to be able to do that again. It may also be that I need to update my WordPress. I’ll work on it :)
Try going into the text edit (where you see the html), and type in [gallery link="file"] – or just [gallery] That is: open square bracket gallery close square bracket. (I don’t know how brackets show in comments.) Either of these should create a gallery of the pics attached to the post.
Pictures you’ve uploaded to the media library and then inserted may not show up, unless you “attach” them to the post in the media library.
Cheers
AH! Beautiful! That worked, thanks so much!
A believable looking transparent glass is not easy to accomplish and your steps are very well explained.
Thank you very much :)
Beautiful!! I love the simplicity of it, yet the amazing detail you achieved…..lovely!
Thanks Pickle!
Fabulous, thanks for sharing :)
Thank you! :)